Continuous building, gating and releasing using AzureDevOps, Helm3, Application Insights and AKS with automated rollback — part 1
This is the first part of a series of posts on deployment processes, where I wanted to document a couple of practices we have been implementing with our customers. I want to show this based on a simple demo application that we have been using for hands on workshops overs the last years and enable you to implement these practices on your own azure environment.
At the end of this post you will know how to implement the following scenario:

To make it more realistic for an enterprise setup here are a couple of design considerations that I consider worth pursuing:
- Your process implementation and all assets should be versioned and stored with your source code — meaning you can re-use the process for another microservice, maybe run it from another repo and it will still work.
- You should not bind your process to the particular implementation of your CI/CD toolchain — meaning we will be using scripts for implementing our build and release steps and not Azure DevOps tasks because they require manual configuration and are hard to test (without Azure DevOps).
- All environment specific variables should be maintained in a secure store and injected into your pipelines — meaning all variables will be sourced from an azure KeyVault instance, which will be dedicated to an environment.
This will be a journey where we will be improving our process and adopting more advanced deployment practices in next posts and I encourage you to join along with your own apps, requirements and feedback.
Lets get started.
First you should fork our phoenix repository which contains the terraform templates, app source code, docker files, helm charts, azure devops pipelines and scripts to build up your environment. The easiest way to deploy everything in your own azure subscription is to open up an azure shell , clone your repo there and follow these instructions to deploy at least one environment — ideally one extra environment so that the deployment process makes more sense for multi stage deployments. After running the deployment scripts please remember the output with the azure devops credentials, because we will need them later.

You should end up with a dedicated resource group for your azure container registry, one resource group for each environment which contains the Azure KeyVault (which should also already contain the configuration variables for that environment), Application Insights, Azure Redis Cache, VNETS, Azure Monitor and an AKS Cluster with an already deployed Nginx Ingress Controller inside plus one extra resource group for your Kubernetes worker nodes. Assuming you have the right permissions you will also have two service principals — one used by your AKS cluster and one is for your Azure Devops service connection to authenticate from your pipeline runners to your azure resources and especially your Azure Container Registry and Azure KeyVault.

Next you should create your Azure DevOps instance by going to dev.azure.com to create your project within your organisation. For the moment I would recommend you to not import the source code into your azure devops repo but rather leave the code on your github fork. Instead lets go directly to Pipelines and import the existing pipeline from your github repo located here: /.azuredevops/calculator_build_deploy.yaml into azure devops.

To adjust the process to your environments you need to configure the name of your azure container registry (where all your containers and helm charts will be pushed to) and the names of the Azure KeyVault instances (which will contain all variables for the right environment) inside the variable section. Then press Save!

You cannot run your pipeline yet because your Azure DevOps instance and also the pipeline runners do not have a way to authenticate and interact with your azure environment yet. For this to work you need to create a new service connection and hand it the credentials that have been generated before you created the environments via terraform.
Go via Project settings -> Pipelines -> Service Connections and create a new Azure Resource Manager connection with Service Principal (manual) and Enter all the values from the terraform deployment output. Also make sure that your Service Connection Name is either set to defaultAzure or matches the name in the pipeline template.
Now you can go back to your pipeline and run it for the first time.
What is happening behind the scenes, is that the azure pipeline runner will download the contents from the repo, download helm 3 (because for some reason the azure devops default ubuntu image still contains helm2 — dont ask me why 🤔), configure our bash script to be executable and run our build script which is stored under: scripts/build_multicalculator.sh

The core idea is our entire build process will be customisation by bash script which will also run within the context of our azure devops service principal in an azure cli session (which also allows us to interact with our azure environment). In this case we are using it to authenticate to our azure container registry and push container images/helm charts to it. The required permissions have been granted during the terraform deployment. There are a couple of advantages to using scripts rather than the built in tasks — the results are reproduce-able, the process is easier to version, we can copy it over to another repo and as a bonus we can run the scripts offline.

Essentially we are not using much of the capabilities of the azure devops yaml pipeline schema and have defined our process as a set of stages. The first one is the build stage (also named Build) which should not produce any artefacts — since everything will be already versioned inside our azure container registry. The only exception are the build scripts which need to match the git changeset of our release process that we are currently in- which is why we are publishing the scripts folder as part of our build process to the staging directory of each release process instance.

As for the deployment stages we are defining a dependancy of the first deployment environment (here called DevDeploy) to the Build stage, give it a random name dev1 (the exact name does not matter but needs to be the same if we have multiple microservices in different release pipelines deploying to the same environment) and introduce the Azure KeyVault instance name dzphoenix-180-vault as a stage variable. All the variables will be accessible under the same name in our bash scripts.

Same as before we are ensuring the latest version of helm and trigger yet another bash script which will implement the exact deployment process. The script deploy_multicalulator.sh will use the azure cli context to authenticate to the configured Azure KeyVault instance, collect the environment specific variables and perform a deployment to the corresponding AKS cluster.

Since we also want to make sure that our deployment actually works we are triggering a traffic script that will in our case do nothing else but check if the ingress controller actually serves our application.

You can probably come up with more advanced ways of validating that your application actually works on your own — or wait until we come the integration with azure monitor in a later post.

Just in case that something goes wrong we are triggering a rollback script that will perform a helm rollback to the latest working helm deployment.
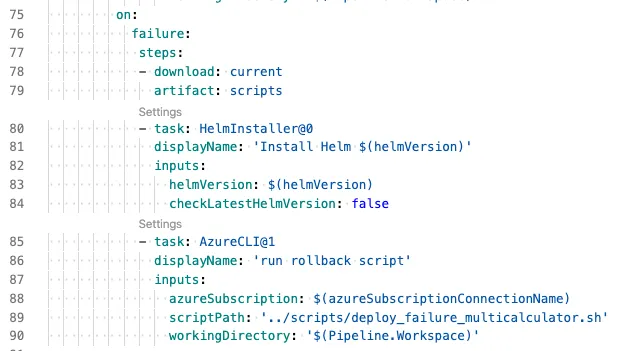
We are again depending on the azure cli session to retrieve the AKS context and perform the rollback via helm.

Assuming everything works fine we will see our change getting automatically deployed across all configured stages.

If you check the ‘Environments’ tab on the left you can see every release status across all deployments — which is very useful if you have not only one release pipeline, but a dedicated pipeline for each microservice.

Our demo application is an unnecessary complicated prime factor calculator running in multiple microservices inside the cluster. You can retrieve the public dns (which is depending on the public ip of the ingress controller inside the cluster) by looking at the log output of the routetraffic task.

Assuming your deployment pipeline works you can now go ahead change sourcecode and see your changes flowing through all of your environments without interrupting your users.

Also worth checking out is if our configuration of Application Insights and Azure Redis Cache worked out. Assuming everything is configured correctly you should be able to see the following in the section Application map of your Application Insight resource for each environment. It will be automatically generated based on the traffic between your microservices and your azure managed services and allows you to compare performance metrics, dependancies between components and trace the calls between them close to real time.

If you are interested in troubleshooting the failing calls and chase the source of the seemingly random delays in the backend responses (hint) I encourage you to play around with these values and use the application map and the performance diagnostics to hunt them down.
While this scenario works and hopefully completes our design requirements from above there are a couple possible issues that I want to outline here:
- The deployment process performs a rollback in even of a deployment failure, but it does not prevent us from suffering application downtime while the broken deployment will be rolled back. Look for part 2 of this series where we will introduce blue/green deployments to solve this.
- During the deployment process we are relying on our deployment user to have access to the cleartext values of our secrets which are pulled from Azure KeyVault. You can imagine that this could be the source of a potential credential leak. Look for part 3 of this series where we are locking down security and permissions in our environments and process.
- The automation of infrastructure deployments is still depending on an external process to implement a process to trigger terraform and set up the pipeline. Look forward for part 4 of this series where we are trying to automate the process completely and include infrastructure changes in our deployment process.
I hope you learned something today and as usual am happy to accept feedback and pull requests in the repo.
Continue here for part 2 of our journey.
Stay tuned!